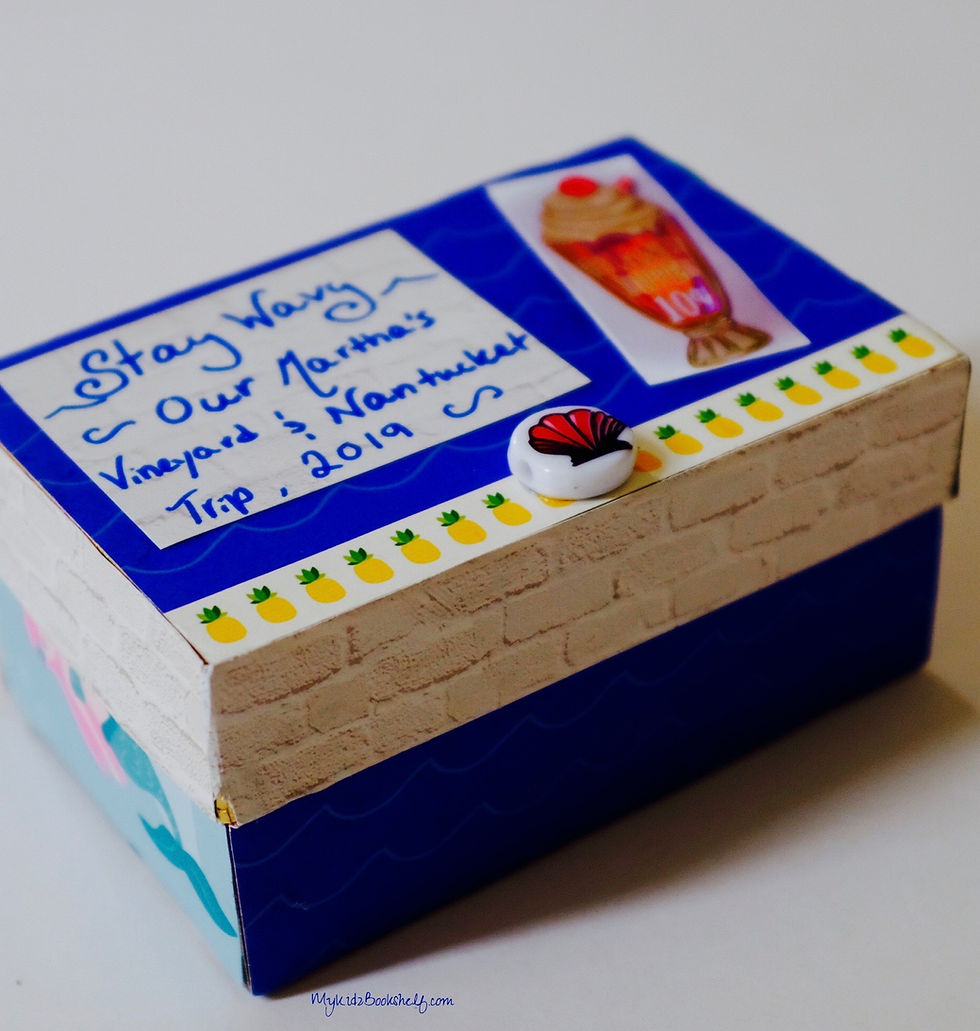
How To Make Your Own 'Stay Wavy' Keepsake Box DIY!
- My Kidz Bookshelf
- Aug 28, 2019
- 3 min read
Updated: Sep 17, 2023
This craft is so much fun and is a great way for kids to remember a special vacation!
Disclosure: This post may contain affiliate links and if you decide to make a purchase through our links, we may earn a small commission at no extra cost to you. Please read our disclosure for more info.

So, after returning from our trip to Martha's Vineyard and Nantucket, I wanted to find a fun way to save some photos of our adventures on these two beautiful islands!

The 'Stay Wavy' box was what I came up with! For those of you thinking about visiting Nantucket, read my mom's post on our whirlwind trip here!

This craft is a fun little keepsake for vacations by the seaside or another event you want to remember!
Super simple and cute, this little box is small enough to not take up too much space, but large enough to store memories of a vacay!
Easily customizable, you can store Instax mini camera photos in it, seashells, tickets or just display it as is!

How To Make Your Own Stay Wavy Keepsake Box DIY!
Supplies:
1 Pair of scissors
Glue (I used Tacky Glue)
Marker or Sharpie

Materials:
1 small box
1 + sheets of decorative scrapbook paper (this depends on how large your box is as well as how many/few patterns you want on your box)
Photos
Paint in colors of choice (I used white and light teal)
Optional: beads, seashells or other small decorative elements
Step One: Measure your box to determine how much paper you'll need.

Step Two: Trace around your box on the paper of your choice. Repeat for all sides inside and out.

Note: When tracing the edges of the box, make sure to trace and cut paper only for the part of the box sides that show when the box is closed... otherwise it will be hard to close or it will stick!
Step Three: Cut out the traced part of the paper.

Step Four: Glue paper to the box. Let dry.

Below is a side view of the box. Isn't this mermaid the cutest?

Step Five: Place photos where you like and glue in place. Let dry.

You can paint the inside of the box too, if you want.

Step Six: Paint the sides of the box that are not decorated with paper (the part you won't see if the box is closed).
Below is the other side of the box. I'm in love with the mermaid paper!

Step Seven: Add embellishments of your choice!
I used several seashells and one bead on top, but you can use sequins, ribbon, buttons or anything else from the craft store or your travels!
You can also give your box a title- like I did on the top!

And there you go! A fun, affordable craft and souvenir for your fabulous vacation!
If you enjoy fun crafts, be sure to check out our other great crafts and DIYs!!

Be sure to Pin this DIY craft for later!
Know someone who might like this fun craft? We'd love it if you'd share!
We hope you enjoy making your new 'Stay Wavy' box! Take a picture of yours and be sure to tag us @mykidzbookshelf!
Happy Crafting!

Enjoyed reading? Subscribe to be the first to know when we've published something new! Fun new stuff right to your inbox!
Great book suggestions, DIYs, homeschool ideas, free printables and more - right to your inbox just for you!
Post originally published: 08/28/2019 Updated: 05/19/2022


Your stay wavy craft box is absolutely adorable! Such fond memories are tucked away in this box. Keep up the great work----such wonderful ideas and so extremely affordable. Your site (with all your extra ideas) surely encourages reading at every level.